In previous updates, when working with grouped units, we added the functionality to allow panels to be named with the panel name, as well as the group name.
When working with groupings, it is common for users to create groupings more than 1 layer deep (for example, you may have a group to represent kitchen units or doors, as well as more abstract groupings like kitchens, studies, bathrooms etc. Within these groups there would be further groups for the actual units etc.)
Why we needed to add level group labelling settings.
Up till now, when you print a layout, it will show the top level group name (ie. Kitchen, Study, Bathroom) This doesn't help a user who would like to see the cupboard name, not the room in which it is grouped.
The problem with this is that if we had multiple identical panels within different grouped units, the labelling would provide no way of knowing which panels belonged to which unit.
For example:

This type of grouping would result in the following labelling:

From Version2.1.8.91 onwards, when creating a group, you can now define at which level you would like the group labelling to be shown. For example:

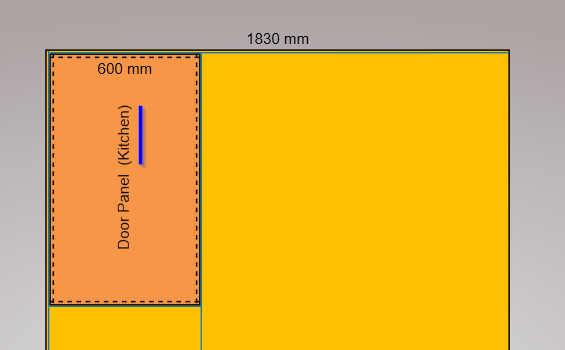
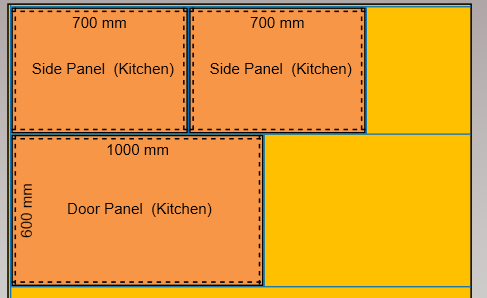
Selecting the group name to be set at the "Kitchen" level will result in the panel labelling being displayed as Door Panel (Kitchen).
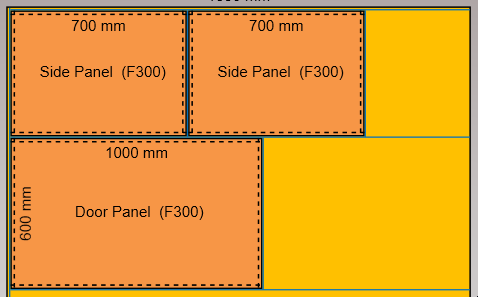
You can now also set the group name to be set at the "F300" level which will result in the panel labelling show up as Door Panel (F300), even though it is in a "Kitchen" group.

Selecting
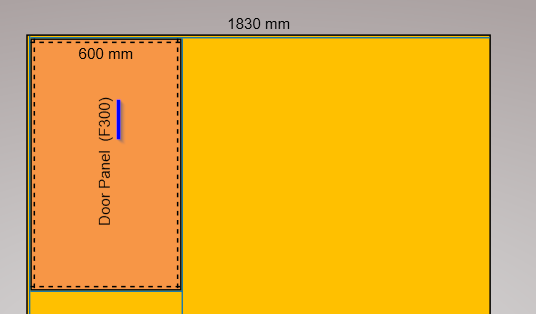
This provides the flexibility to set which level you want the group name to be displayed.
How to set the group labelling level
There are a number of ways to set the level of group labelling:
Method #1 : Set at Library Item level
You can set the group labelling at the library item level - for each library item. When set within the library item, the chosen labelling will be used each time that library item is used.
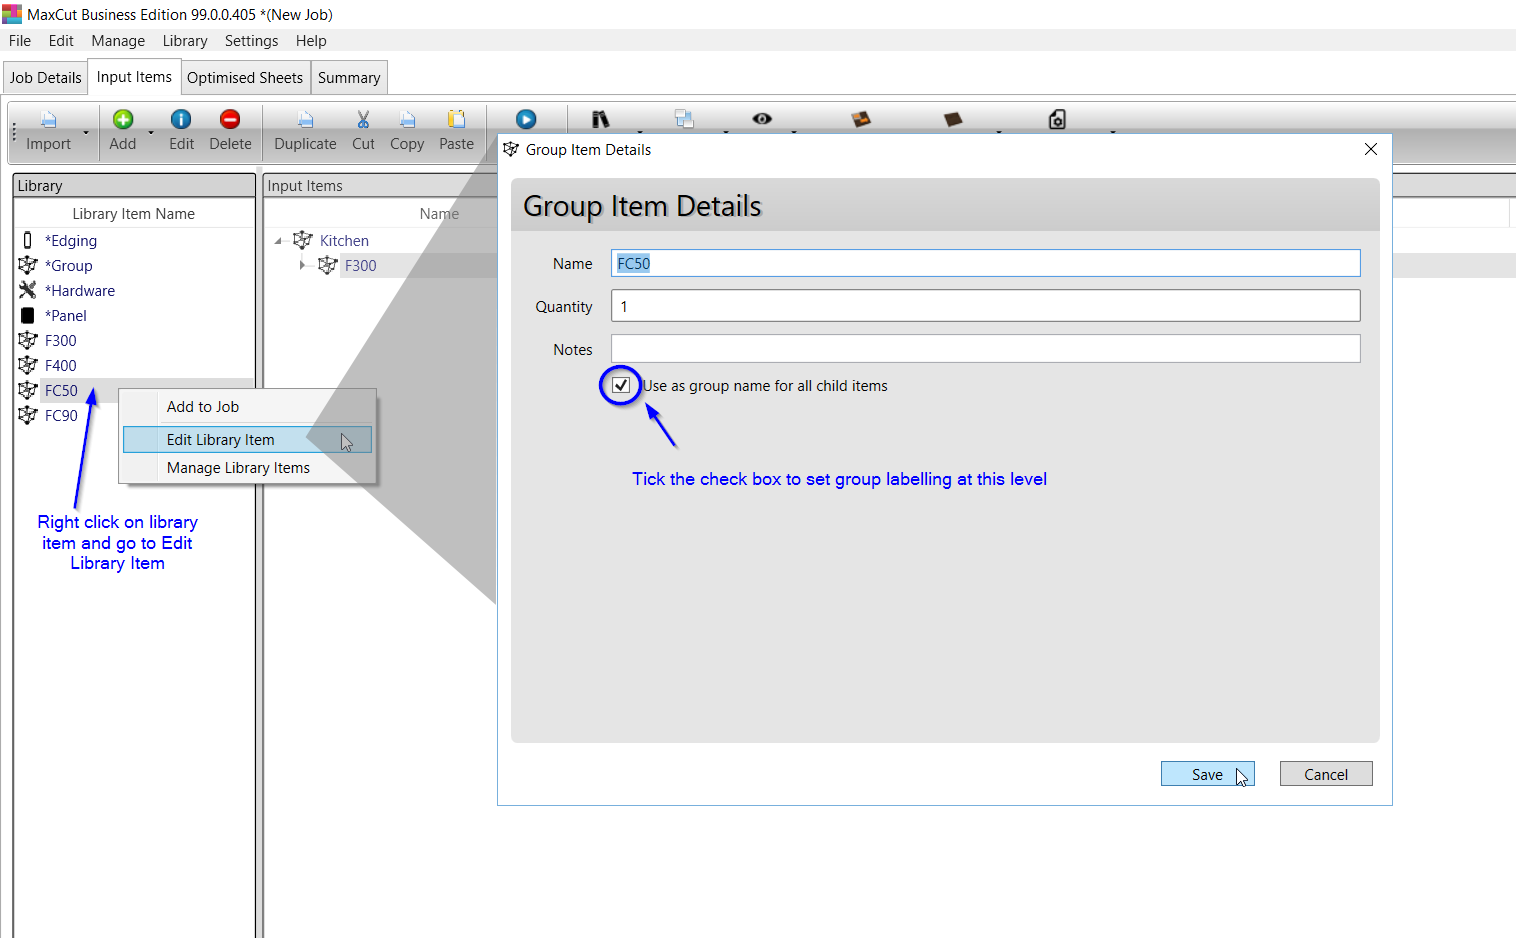
Resulting labelling for each panel in the library item group will then be in the format "Panel Name (Library Item Name)"

Method #2 : Set at individual Group Level
You can also set the labelling level at an individual level for each new group created or for existing groups already in a job.
Existing Groups:
In the following job, let's say you want to set the labelling at the unit level (for Unit F300)
You would therefore double click on the F300 unit and then tick the box in the Group Item Details window.
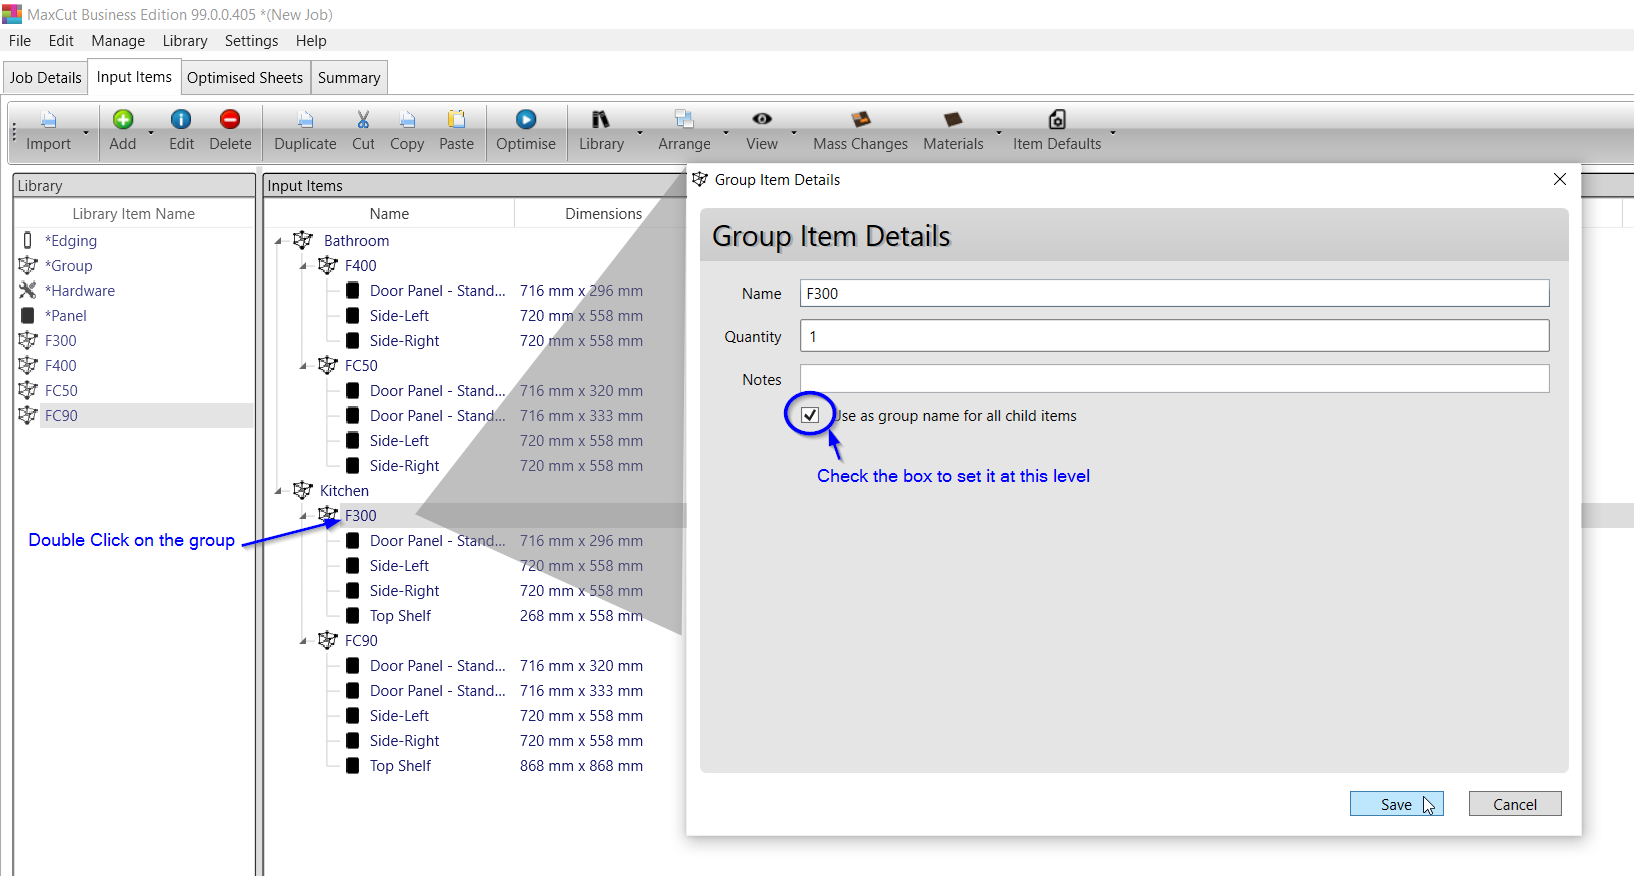
All panels in this group will then be labelled as follows:
New Groups:
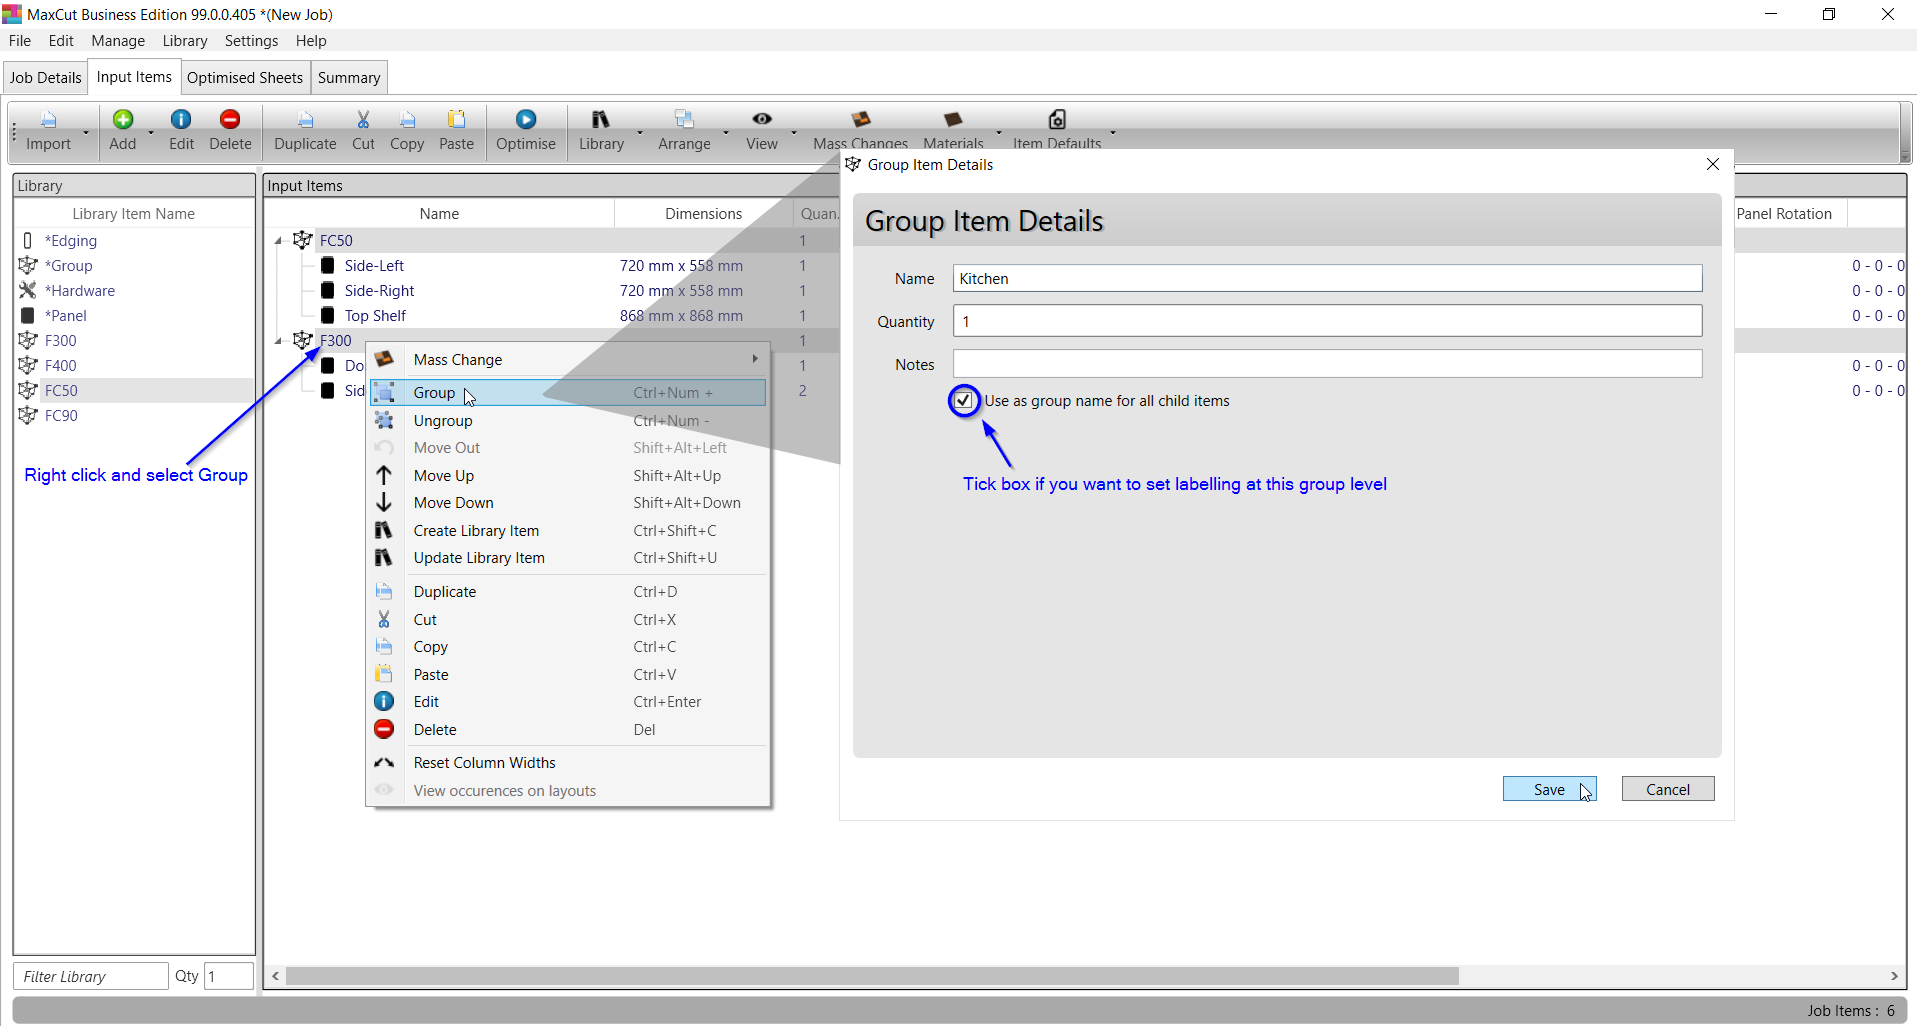
In the following job, let's say you want to create a new group called "Kitchen". Instead of setting the labelling level at the "unit" level, you would prefer to set it at the "room" level.
You can do this while creating the new group called "Kitchen"
You would click on all the units or groups you would like in your new group (while holding down the Ctrl key) . Then right click on one of these highlighted units/groups and click on "Group".
You can then select if you want to have this group labelled at this level by checking the tick box.
Labelling of the panels now shows grouping level selected at "room" level.
Just a Reminder
Just a reminder that in order to view the labels showing the grouping labels, you need to have the your settings set as follows:
Settings -> Layout -> Layout Grouping
Then select Panel Name + Group Name

Comments
0 comments
Please sign in to leave a comment.